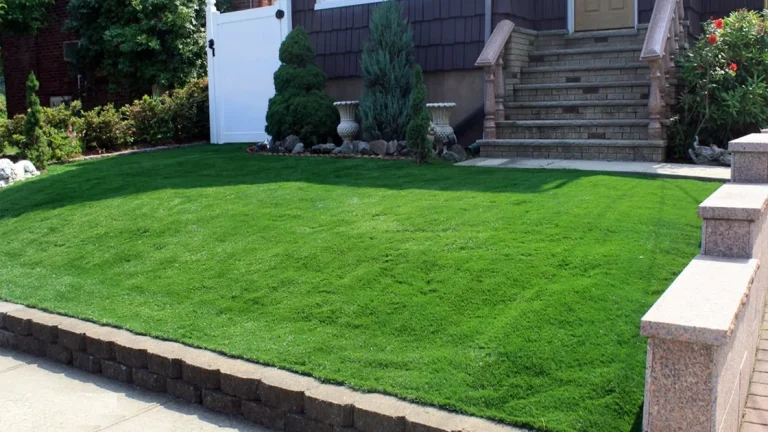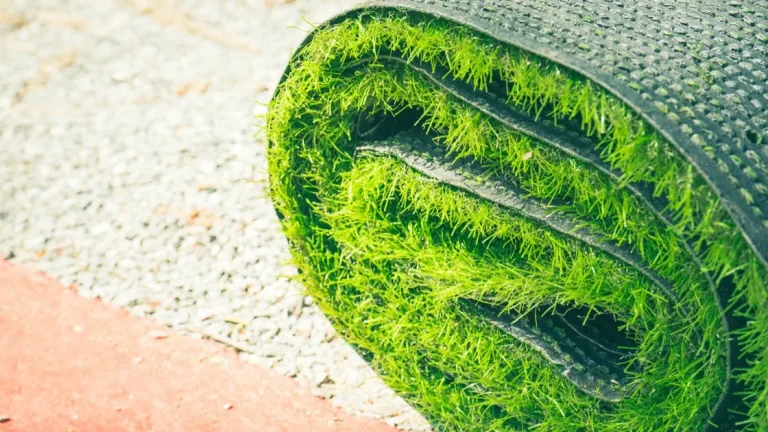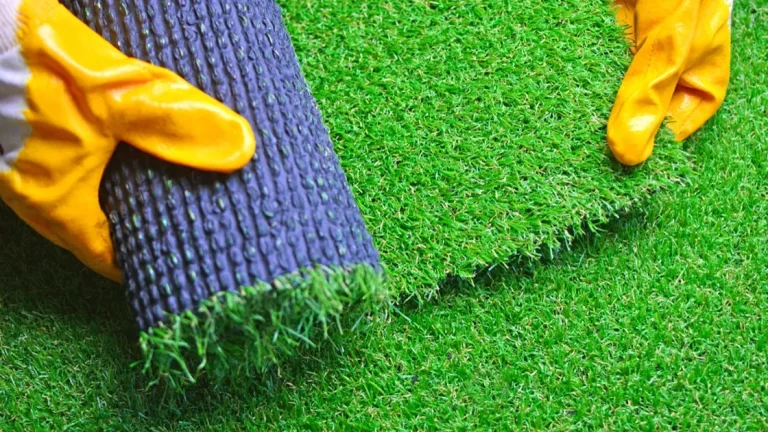







Most artificial grass installation mistakes announce themselves within a month of handover — puddles after the first real rain, a join line the client picks out from the patio door, edges lifting before the final payment clears. We manufacture turf at Relyir Grass, and the panic calls that reach us from installers follow a stubborn pattern: the grass itself almost never fails. The base under it does. The seam does. The anchoring does. Every one of those errors is easy to fix once you know what caused it.
A failed join never stays a $40 tape problem once the client has paid five figures for the lawn. The client who wrote that check expects the seams to be invisible — full stop. When they’re not, you’re into a callback, a warranty argument, and a referral source gone quiet. My position after 18 years on the supply side: most seam failures aren’t craftsmanship problems. They’re layout problems. Nobody confirmed pile direction before the rolls went down, and no amount of tape rescues that after the fact.
Seven mistakes account for nearly every failed job, and each one below comes paired with its fix. Start with the symptom: pooling water points to base depth and compaction, visible joins to seaming technique and pile direction, matted traffic lanes to infill. Then jump straight to the repair. Diagnose it right on the first visit, fix it in an afternoon, and your crew stays off the return trip — which is where your margin actually lives.

What’s Wrong? Match Symptoms to the Real Mistake
Misread the symptom and you pay for the same repair twice — once in labor, once in credibility. After 18 years of troubleshooting installations across more than 50 countries, our team has learned one uncomfortable truth: the failure you can see is almost never the failure you need to fix. Pooling water points to base engineering, not the turf. Visible seams point to roll orientation, not the turf.
After 18 years of troubleshooting installations across more than 50 countries, our team has learned one uncomfortable truth: the failure you can see is almost never the failure you need to fix. Pooling water points to base engineering, not the turf. Visible seams point to roll orientation, not the tape. The diagnostic table below is designed to be used before anyone touches a repair tool — because cutting into the wrong layer turns a localized fix into a full tear-out.
| Symptom (What You See) | The Real Mistake | Engineering Fix & Spec | Cost of Ignoring It |
|---|---|---|---|
| Water pooling on the surface or mud slurry surfacing through drainage holes | No engineered base — turf laid directly over native soil, or excavation skipped entirely | Rebuild with a 3–4 in. (75–100 mm) base of crushed granite or Class II road base, compacted in 2-in. lifts to 90–95% with a plate compactor, graded at a 1–2% slope (1 in. drop per 10 ft) | Full tear-out and re-installation — at $15–25/sq ft professional rates, this is the single most expensive error to reverse |
| Wrinkles, ripples, and soft bumps appearing days or weeks after installation | Rushed acclimation and no power stretching — turf installed cold, tight, or straight off the roll | Unroll and rest turf ≥40 minutes before securing, power-stretch at full tension, and fasten with 5 nails per 4–6 ft of lateral spacing while it settles | Permanent creases, premature wear at high spots, and trip hazards that no amount of brushing will flatten out |
| Checkerboard shading or a dark seam line snaking across the lawn | Conflicting grain (pile) direction between rolls, plus seams placed in high-visibility or high-traffic zones | Run every roll pile-facing the same direction (typically toward the main viewpoint); position seams in low-traffic areas and join with seaming tape plus adhesive — never nails alone | Real-world rework bills in the $10,000 range just to hide patchwork seams on residential projects |
| Weeds and grass pushing up through seams, perforations, and edges | Skipped weed barrier, or barrier installed in the wrong sequence (it must go after base prep, before turf) | Lay a quality geotextile weed barrier over the compacted base before turf; in pet areas, substitute a ground-applied weed preventer instead — fabric barriers absorb and trap urine odor | Root systems lift the base into bumps, and each removal session damages turf seams |
| Persistent ammonia odor that returns days after every cleaning | Pet area built without rinse-through drainage — no slope, no washable infill, sometimes an odor-trapping barrier underneath | Design pet zones with the full 1–2% drainage slope, zeolite or odor-control infill instead of plain sand, and a permeable base so urine flushes through, not sits under | Odor locks into the base layer itself — the only cure is lifting the entire lawn and rebuilding |
| Edges lifting, curling, or separating from the perimeter over time | Inadequate edge securing — too few fasteners or no anchoring strategy at the boundary | Pin the perimeter with galvanized nails or staples at close 4–6 in. intervals, tucking edges under hardscape or locking them into edging systems | Exposed backing, progressive unraveling, and a genuine tripping hazard along walkways |
| Fibers matted flat and the lawn looking tired within the first year | Insufficient or wrong infill — skimped quantity, uneven distribution, or the wrong material for the application | Distribute infill evenly to the manufacturer’s specified depth (silica sand for landscape, zeolite or performance blends for pets and sports), then power-brush fibers upright; match infill to application, not price | Matted fibers, degraded drainage, and a lifespan cut short by years on a lawn meant to last a decade-plus |
| Gaps, buckling, or seam separation appearing after hot-cold swings or freeze-thaw cycles | Turf pinned with zero thermal allowance and no climate adaptation — installed at one temperature extreme and lived with at another | Leave a slight expansion allowance at installation, secure at a mid-range temperature, and spec UV-stabilized turf with drainage engineered for local freeze-thaw and rainfall intensity | Seasonal failure that repeats every year — stretching, gapping, and seam stress compounding annually |
| An extension or replacement roll looks visibly lighter or darker than the original lawn | Mixing yarn or dye lots on repeat orders with no color verification between production batches | Order the full project quantity from a single production lot, and work with manufacturers performing golden-sample batch verification on repeat orders — a standard step in Relyir’s in-house QC protocol | A permanent two-tone lawn; no fix exists after dissimilar lots are installed side by side |
How to Run This Diagnostic in Under 10 Minutes
The table works best when you interrogate it in a fixed order. We train contractor partners to walk the site in this sequence because it separates cosmetic symptoms from structural ones before any money is spent:
📋 Actionable Steps
- Step 1: Water test first. Pour a bucket of water at the lowest visible point of the lawn. If it pools longer than a few minutes, stop — everything else on your punch list is secondary, because the failure sits beneath the turf, not in it.
- Step 2: Read the shadows. View the lawn from the primary sightline (patio door, street, main seating). Alternating light and dark bands mean roll grain was never unified — this is an orientation error, not a product defect.
- Step 3: Walk the field with bare feet or thin soles. Soft bumps underfoot with no visible wrinkling usually indicate base settlement or infill migration; visible ripples with taut edges point to tension and acclimation errors during install.
- Step 4: Check the perimeter last. Lift a corner gently. If edges lift with minimal resistance, the anchoring interval was too generous — and every other symptom you found will recur until the perimeter is re-secured.
The order matters because each check either confirms or eliminates an entire failure family. A passing water test effectively clears the base-and-drainage row of the table; a failing one means seam repair and infill top-ups are wasted money until the substructure is rebuilt. This triage logic is what separates a $400 correction from a $10,000 do-over, and it is the single most valuable conversation to have with a contractor before signing off on any remediation quote.
Pooling Water: Reading Drainage and Base Errors Beneath the Surface
Standing water is the loudest symptom in the table, and the most frequently misdiagnosed. Homeowners blame the turf’s perforations; contractors sometimes blame the product. In our experience reviewing failed installations, the turf itself is rarely the culprit — drainage holes move water downward, but they cannot make water travel sideways through an unprepared subgrade. When mud slurry surfaces through those same holes, that is direct physical evidence the turf was laid over native soil with no engineered base at all.
There are two distinct engineering layers at play, and they fail for different reasons. The first is gravity geometry: the finished grade must carry water toward a designed exit, which is why the slope specification exists at all. The second is permeability: the base aggregate must remain loose enough structurally to let water pass through it and away, even after years of compaction loads. A base can be rock-solid and still fail hydrologically if it was graded flat “because it looked easier,” or built from fine materials that slurify when saturated. Clay-heavy soils are the worst offenders here — they swallow water slowly, hold it longer, and turn any base built on top of them into a bathtub with a sealed bottom.
For B2B buyers, this is also where supplier conversations matter. Base engineering happens on site, but the turf above it must cooperate — backing permeability, drainage hole density, and coating chemistry all determine how quickly water exits the system once it leaves the aggregate. This is one of the reasons our engineers treat drainage performance as a specification to be verified, not a marketing claim: when a project fails hydrologically, the turf takes the blame regardless of whose layer actually failed. Buying turf with verified permeability data is cheap insurance against inheriting that argument.
Visible Seams and Gaps: Joining Mistakes Identified
A seam that shows is a seam that was compromised twice — once in planning and once in execution. The planning error is positional: seams placed down the center of a lawn, across a sightline, or perpendicular to the main viewing angle convert a structural joint into a visual feature. The execution error is mechanical: fastening with nails alone instead of full-width seaming tape and adhesive, which leaves the joint free to flex, gape, and eventually separate as the substrate moves beneath it.
The subtler joining failure is dimensional — and it only reveals itself after temperature swings. Turf expands in heat and contracts in cold. When installers butt two rolls together tightly at midday, the contraction that follows the evening cooldown pulls the joint open a few millimeters; repeat that cycle across a season and the gap becomes a permanent dark line. Experienced crews join seams with a slight gap allowance and secure them while the turf is at a mid-range temperature, accepting minor tension in summer heat rather than guaranteeing gaps every winter. Installations in freeze-thaw climates face the compounded version of this: the substrate itself heaves seasonally, so seam flexibility is not optional — it is the joint’s entire survival strategy.
One diagnostic nuance worth internalizing: a seam that looks dark is a different failure than a seam that looks open. Dark seams usually mean the two edges are slightly overlapped or the pile collapsed into the joint — a cosmetic issue fixable by re-dressing fibers. Open seams with visible backing mean the adhesive line was starved, the tape was too narrow, or the substrate was dusty when the glue went down — a structural issue that will worsen. Inspect with this distinction before authorizing any repair, because the fix (and the invoice) is completely different.
Matted Blades and Soft Bumps: Infill or Base Prep?
Matted fibers and soft, unstable footing get lumped together as “the lawn went flat,” but they are signatures of two entirely different layers — and telling them apart takes about sixty seconds. Press your palm firmly into the affected area and slowly lift. If the blades spring back slowly or not at all while the surface stays firm, the infill layer has settled, migrated, or was under-filled from day one. If your hand sinks and the surface feels mushy or you hear a faint crunch of aggregate shifting, the problem is underneath: base settlement, or infill that washed down into an under-compacted base. The symptom location tells you which invoice to expect — one is a top-dressing service, the other is excavation.
The infill failure mode deserves particular attention because it is self-accelerating. Infill is not decoration; it is ballast that keeps fibers upright, protects the backing from UV and foot traffic, and adds the mass that helps the turf stay dimensionally stable. When distribution is uneven — heavy in some zones, sparse in others — traffic pushes what little remains out of the thin zones, those zones mat first, matted fibers shed more, and the degradation front spreads. We have seen lawns less than two years old look a decade worn purely because infill was spread by eye instead of by specification, then never power-brushed to work it down between the blades where it actually functions.
Application matching is the other half of the equation, and it is where value engineering quietly destroys projects. A landscape lawn, a dog run, and a putting green impose completely different demands on the infill column — pet zones need washable, odor-controlling media; play and sport zones need impact-modifying blends; ornamental lawns need economical ballast matched to fiber type. Substituting a cheaper generic across all three “because they look the same in the bag” is the exact mistake the table’s matted-fiber row exists to catch. When our team specs a project, the infill choice is matched to the verified application before the turf specification is even finalized — reversing that order is how the wrong material ends up in the ground.
For the installer mid-diagnosis, the layer you choose to repair matters more than the tools you repair it with. Fix the wrong one and an afternoon brush-and-top-up quietly becomes a full base rebuild — and per the Product Bible, rework on a failed install adds $8–15/m² in extra labor, enough to erase the margin on a typical residential patio. The table above has already narrowed the fault to a layer; the discipline is spending the repair budget there, not one level up. The same layer-first logic holds when the symptom isn’t texture at all but water.
| Symptom (What You See) | The Real Mistake | Engineering Fix & Spec | Cost of Ignoring It |
|---|---|---|---|
| Water pooling on the surface or mud slurry surfacing through drainage holes | No engineered base — turf laid directly over native soil, or excavation skipped entirely | Rebuild with a 50–75mm base of angular crushed rock, compacted in 25–30mm lifts to ≥95% Proctor density with a plate compactor, graded at a 1–2% fall (10–20mm per meter) away from structures. | Full tear-out and re-installation — at $15–25/sq ft professional rates, this is the single most expensive error to reverse |
| Wrinkles, ripples, and soft bumps appearing days or weeks after installation | Rushed acclimation and no power stretching — turf installed cold, tight, or straight off the roll | Unroll and rest turf ≥40 minutes before securing, power-stretch at full tension, and fasten with 5 nails per 4–6 ft of lateral spacing while it settles | Permanent creases, premature wear at high spots, and trip hazards that no amount of brushing will flatten out |
| Checkerboard shading or a dark seam line snaking across the lawn | Conflicting grain (pile) direction between rolls, plus seams placed in high-visibility or high-traffic zones | Run every roll pile-facing the same direction (typically toward the main viewpoint); position seams in low-traffic areas and join with seaming tape plus adhesive — never nails alone | Real-world rework bills in the $10,000 range just to hide patchwork seams on residential projects |
| Pet installations are where a contradictory barrier recommendation does the most expensive damage. Weeds and grass pushing up through seams, perforations, and edges | Skipped weed barrier, or barrier installed in the wrong sequence (it must go after base prep, before turf) | Lay a permeable needle-punched nonwoven geotextile weed barrier over the compacted base before turf, overlapped a minimum of 100mm (150–300mm on slopes or soft soils); odor trapping is caused by impermeable plastic film, not permeable geotextile, so the fabric stays pet-safe — for urine-odor remediation, follow the adjacent drainage/infill row | Root systems lift the base into bumps, and each removal session damages turf seams |
| Persistent ammonia odor that returns days after every cleaning | Pet area built without rinse-through drainage — no slope, no washable infill, sometimes an odor-trapping barrier underneath | Design pet zones with the full 1–2% drainage slope, zeolite or odor-control infill instead of plain sand, and a permeable base so urine flushes through, not sits under | Odor locks into the base layer itself — the only cure is lifting the entire lawn and rebuilding |
| Nothing exposes an under-specified edge faster than a season of foot traffic. Edges lifting, curling, or separating from the perimeter over time | Inadequate edge securing — too few fasteners or no anchoring strategy at the boundary | Pin the perimeter with 150mm galvanized nails every 200–300mm, placed 30–40mm inside the edge, tucking edges under hardscape or locking them into edging systems | Exposed backing, progressive unraveling, and a genuine tripping hazard along walkways |
| Fibers matted flat and the lawn looking tired within the first year | Insufficient or wrong infill — skimped quantity, uneven distribution, or the wrong material for the application | Distribute infill evenly to the manufacturer’s specified depth (silica sand for landscape, zeolite or performance blends for pets and sports), then power-brush fibers upright; match infill to application, not price | Matted fibers, degraded drainage, and a lifespan cut short by years on a lawn meant to last a decade-plus |
| Gaps, buckling, or seam separation appearing after hot-cold swings or freeze-thaw cycles | Turf pinned with zero thermal allowance and no climate adaptation — installed at one temperature extreme and lived with at another | Leave a slight expansion allowance at installation, secure at a mid-range temperature, and spec UV-stabilized turf with drainage engineered for local freeze-thaw and rainfall intensity | Seasonal failure that repeats every year — stretching, gapping, and seam stress compounding annually |
| An extension or replacement roll looks visibly lighter or darker than the original lawn | Mixing yarn or dye lots on repeat orders with no color verification between production batches | Order the full project quantity from a single production lot, and work with manufacturers performing golden-sample batch verification on repeat orders — a standard step in Relyir’s in-house QC protocol | A permanent two-tone lawn; no fix exists after dissimilar lots are installed side by side |
Mistake 1: Sloppy Base Work That Pools Water
Beneath every ponding lawn sits a base that was never engineered to specification. Pooling water on artificial grass is almost never a turf problem — it is a base problem. The fix happens before installation: excavate to receive a 50–75mm compacted base of angular crushed rock, strip every trace of organic soil, compact in 25–30mm lifts to ≥95% Proctor density, and grade a 1–2% fall — 10–20mm per meter away from structures — so water has somewhere to go.
Nearly all quality synthetic turf is manufactured with a perforated backing that passes water through in seconds. So when a finished lawn turns into a shallow pond after the first real rain, the carpet is not failing — the foundation underneath it is. Either the sub-base has dips from poor compaction, or the grade was never cut to move water off the field. For contractors, this is the most expensive mistake in the entire workflow because it is usually discovered only after the turf is down, when correction means pulling up the surface, rebuilding the base, and re-laying everything at several times the original prep cost.
Why Pooling Almost Never Comes From the Turf Itself
The drainage engine of any artificial grass system is the compacted aggregate layer below it. When that layer is built sloppily, three failure modes stack on top of each other: uncompacted fill settles under foot traffic and creates new low spots; organic material buried in the base decomposes and leaves voids that collapse into dips; and without a designed slope, every one of those dips becomes standing water. Trapped water then works on the turf’s underside, degrading the backing, feeding mold, and — in areas where pets use the lawn — turning urine residue into a concentrated odor source. On putting greens the stakes are even higher, because a dip that holds water is also a dip that breaks every ball rolling across it.
Excavate Deep Enough — and Haul the Organics Off Site
Most base failures start with the shovel, not the compactor. Existing lawn, weeds, roots, and topsoil must be stripped and removed entirely — never rototilled into the subgrade. Topsoil is organic-rich and compressible by nature; even a 25mm layer of buried sod will decompose over one or two seasons and leave a sunken, water-collecting patch exactly where the shortcuts were taken. Irrigation lines inside the work zone should be capped or rerouted at this stage, since a slow leak under a finished base will undermine compaction from below.
- Excavation depth: 75–100mm (3–4 in) for standard landscape installs; extend to roughly 150mm (6 in) in soft clay soils or high-traffic zones that need more base material.
- Sub-base material: angular crushed stone, decomposed granite, or road base in the 20mm-minus class. Angular particles interlock under the plate; rounded pea gravel does not and should never be used as structural fill.
- Blended mixes: a crushed-stone base blended with granite fines or coarse sand compacts tight while still draining — sand alone stays loose, and open stone alone leaves bridging voids.
- Organic tolerance: zero. Any visible root, thatch, or dark topsoil in the work area gets hauled off site before the first lift goes down.
Compact in Lifts, Not in One Pass
Depth, not effort, is what defeats the average plate compactor on fresh aggregate. Dumping the full depth of aggregate at once and running a plate over the top is the single most common compaction error. A vibrating plate only consolidates the top 50–75mm of material — and well short of target density at that — so everything beneath it stays loose and will settle through the first few wet-dry cycles. Professional practice is to place the base in lifts of 25–30mm (1–1¼ in), lightly dampening each lift — moist, never saturated — so particles knit together, then making 2–3 passes with a proper walk-behind plate compactor before the next lift goes down. A hand tamper does not deliver enough energy to hit the density targets contractors work to, which sit at ≥95% Proctor density for aggregate base. The field check is simple: after the final pass, an adult’s heel should leave no visible print. If it does, that lift needs more passes.
Build In the 1–2% Drainage Fall
Compaction gives the base stability; grade gives it function. The standard specification is a 1–2% fall — 10–20mm of drop per meter, or roughly 1/8 to 1/4 inch per foot — sloped away from buildings and hardscape so surface water exits the area instead of accumulating. String lines with a line level work for simple rectangles; a laser level pays for itself on irregular yards where multiple drainage directions are involved. Pet runs benefit from sitting at the steeper end of that range, closer to 2%, because moving urine and rinse water off the field quickly is the primary odor-control strategy. Before any turf is rolled out, run a hose over the finished base: water should sheet away within moments, and every spot where it lingers is a correction point that costs nothing to fix today and a full re-grade to fix next season.
The Fix Path: Correcting a Base That Already Pools
When pooling shows up on a finished install, the repair strategy depends on how deep the fault runs. Patching the symptom without touching the cause guarantees a callback within weeks.
📋 Actionable Steps
- Step 1 — Map the failure: Soak the area with a hose or wait for natural rain, then outline every ponding zone with marking paint or chalk while the water is still standing.
- Step 2 — Top-dress shallow dips: Depressions under roughly 15mm can be corrected by peeling back the turf, adding a matching fine aggregate, screeding to the surrounding grade, re-compacting, and re-laying the surface. Loose material dropped in without compaction will settle again almost immediately.
- Step 3 — Excavate soft spots: Areas that feel spongy underfoot indicate trapped organic matter or uncompacted fill. Cut the patch out down to firm subgrade, remove the black organic soup completely, and rebuild that section in compacted lifts to match the surrounding base height.
- Step 4 — Re-grade persistent fields: If water pools across broad areas rather than in isolated dips, the original grade never existed. Pull and roll the turf, reshape the sub-base to the 1–2% fall, re-compact, and re-lay. This is the disruptive version — which is exactly why the fall should be verified before the first roll is opened.
- Step 5 — Re-test before handover: Repeat the hose test on the repaired sections. Any water still standing after a moderate soak marks another correction point, and it is far cheaper to catch it now than after the site is demobilized.
Mistake 2: Visible Seams That Start to Fail
Seam failures draw from a short list of causes, which is why this article should name them exactly once.
Almost every visible seam traces back to one of three root causes: the installer stretched the turf to close a gap, skimped on adhesive coverage, or ignored the direction the fibers lay at the joint. None of these are material defects — they are bonding errors, and they follow a predictable escalation. A seam that shows on day one will almost always open within the first season of foot traffic and thermal movement, because a joint installed under tension or with a starved glue line has no reserve strength when the backing expands and contracts.
The Four Failure Patterns Worth Recognizing
Before touching adhesive, diagnose what the seam is actually doing. Each pattern points to a different root cause and a different fix:
- Opening gap: the two edges drift apart and expose a dark line of backing between them — usually the result of bonding under tension, so the joint pulls apart as the backing relaxes.
- Glue-starved flap: one or both edges lift and curl because adhesive only made contact in the center of the tape, leaving the outer centimeters of each edge unbonded.
- Tenting ridge: a raised ridge runs along the joint where two pieces were pulled tight and glued, locking compression into the seam that pushes upward over time.
- Grain mismatch line: the seam reads as a two-tone stripe even though the glue is perfect, because one piece was laid with the fibers running toward the viewer and the adjacent piece away.
The first three are adhesive problems. The fourth cannot be fixed with more glue — it has to be caught before bonding, which is why the pre-glue checks below matter more than the adhesive itself.
Seam Tape and Adhesive: The Correct Application
The professional standard is a dedicated seaming tape — typically 150–300 mm wide, woven or film-backed — centered under the joint and bonded with a two-part polyurethane adhesive rated for exterior UV and temperature cycling. PU adhesive stays flexible through freeze-thaw and summer heat, which is exactly what a joint under daily thermal movement needs.
The shortcuts that fail are well known on job sites: generic construction adhesives that turn brittle in cold weather, hot-melt glue that softens under direct sun, and the classic error of applying a thin glue bead down the center of the tape only. The target is a full, even coat across the tape’s working width so each turf edge lands with roughly 75–100 mm of bonded backing. A narrower glue line concentrates every peel load — foot traffic, vacuum strokes, a dog pawing at the edge — onto a fraction of the intended bond area, and glue-starved seams are the inevitable result.
One detail separates invisible seams from amateur ones before any adhesive is opened: the cut edge of a turf roll always has an outer row of tufted stitches that curls and frays. Trimming roughly three stitches — about one full tufting row — off both pieces at the joint removes those curled fibers. Skip this step and even a perfectly glued seam will show a dark stitched line running down its length.
Tension-Free Joining: Respect the 2–3 mm Glue Gap
Never stretch turf to close a seam. Polypropylene and PU backings expand and contract with temperature, and a joint bonded under tension is a loaded spring — it will tent, ridge, or split as soon as conditions change. The correct method is to butt the two backings together with a deliberate 2–3 mm gap, pin or weight both sides so neither piece can move, then lay the glued tape into the gap and close the joint from one end to the other without pulling.
That small gap is not sloppiness — it is the joint’s expansion allowance. During a dry fit, fold both edges back, confirm the stitch rows align and the edges meet cleanly with the gap set, and only then commit to adhesive. Once PU adhesive cures, there is no repositioning.
Check Grain Direction at the Joint Before You Bond
At every seam, the fibers on both sides must lie the same way. Run a hand across both pieces at the joint: one direction feels smooth, the opposite feels rough. If the two sides disagree, stop and rotate the piece before gluing — no amount of adhesive or infill will hide a seam where the grain flips, because the light hits the fibers differently on each side of the joint.
Repairing a Split or Glue-Starved Seam Without a Reinstall
This is the part every buyer paying a five-figure install bill wants to hear: a failed seam is a localized repair, not a lawn replacement. For a split or opening joint, the crew opens the failed section, cleans off the old adhesive, sets in fresh tape with a full PU glue coat, re-establishes the 2–3 mm gap with no tension, and weights the seam through cure — most two-part PU systems need roughly 12–24 hours before the joint takes full traffic. For a glue-starved seam where the edges have lifted but the tape is intact, the fix is even smaller: lift the edge, work fresh adhesive under the full tape width with a scraper or nozzle, and re-weight through cure.
The economics are lopsided. A seam repair consumes a few linear meters of tape and one adhesive kit. Tearing out and reinstalling on a lawn where a homeowner paid roughly $10,000 means re-buying base material, turf, and labor — which is why an installer who insists a visible seam “can’t be fixed” is really telling you how the rest of the job was built. Seam quality is also the fastest workmanship tell when comparing quotes: ask bidders where seams will be placed relative to sightlines and traffic, and which adhesive system they use. A contractor who answers “two-part PU, dry-fit, trimmed edges, no tension” has already told you how they handle everything else.
Mistake 3: Too Little or Too Much Infill
Infill dosing is kilogram math first and brushing technique second. The sand is the ballast and backbone of a synthetic lawn — it holds blades upright, shields fibers, and keeps the surface stable underfoot — which is why incorrect application remains one of the most common installation errors in the trade. The working standard is set by loading rate, not by eye: ≈12 kg/m² of silica sand for 30 mm pile and ≈16 kg/m² for 40 mm pile, always confirmed against the manufacturer’s spec sheet before the first bag is opened. The 10–15 mm exposed-blade rule survives only as a visual field check — a quick way to verify that the measured dose has brushed down evenly, never a shortcut that licenses stopping the pour early. Too little infill lets blades fold flat, exposes fibers to abrasion at the base, and leaves the turf loose underfoot. Too much buries the blades under a sand layer that compacts into a hard crust, tracks indoors, and dulls the lawn’s appearance. Both errors show up within the first season — and both are fully preventable by weighing to spec and brushing correctly.
Correct Infill Rates by Pile Height
Infill dosage is a function of pile height and thatch density — not bag convenience. Every turf manufacturer prints a recommended infill rate on the product spec sheet, and deviating from it compromises both performance and warranty standing. The universal target is the exposed-blade rule: on a 40 mm turf, leaving 12 mm exposed means filling roughly 70% of the pile; on a 25 mm product, the same 10–15 mm exposure means proportionally less sand by volume.
| Turf Pile Height | Target Fill Level | Typical Application Rate |
|---|---|---|
| 20–30 mm (0.8″–1.2″) | Leave 10–15 mm of blade exposed | ≈8–12 kg/m² (≈1.6–2.5 lb/ft²), scaled down from the 12 kg/m² anchor at 30 mm |
| 30–40 mm (1.2″–1.6″) | Leave 10–15 mm of blade exposed | ≈12–16 kg/m² (≈2.5–3.3 lb/ft²) |
| 40–50 mm (1.6″–2.0″) | Leave 10–15 mm of blade exposed | ≈16–20 kg/m² (≈3.3–4.1 lb/ft²) |
To turn a per-square-meter rate into a defensible quote, start with the tonnage it implies. For contractors estimating material, the volume adds up fast: a 100 m² lawn at 12–16 kg/m² requires 1,200–1,600 kg of infill — 48 to 64 standard 25 kg bags. Factor that weight into freight, staging, and labor hours before quoting. Note that putting greens and sports surfaces sit outside these landscape norms entirely; they use finely graded sands at rates set by their own specification sheets, so never reuse a landscape rate on them.
How Under-Filling Shows Up on the Lawn
Under-filled turf rarely fails quietly. The symptoms appear in predictable order, usually within weeks of the first foot traffic:
- Rapid matting: Blades in traffic lanes fold flat because there is no sand column supporting them at the base. The lawn develops a shiny, flattened grain along walkways.
- Loose, shifting surface: Infill provides roughly half the system’s ballast. Without it, the turf moves underfoot and can shift against its anchoring.
- Premature fiber wear: Sand cushions the fiber at the root, where flexing is most aggressive. Bare, unsupported blades crack and shed far earlier than spec.
- Worsening pet odor: On under-filled lawns, urine clings to blades instead
Mistake 4: Laying Rolls in the Wrong Direction
Every turf roll ships with a factory-set pile direction. Install adjacent rolls with opposing grain and the lawn splits into alternating light and dark bands — a checkerboard defect that brushing can only soften, never fully erase.
Artificial grass is tufted in one direction, which means every roll has a built-in “grain” — the lean of the blades relative to the backing. When all rolls in an installation run the same way, light reflects off the blades uniformly and the surface reads as a single, consistent shade. When one roll is laid against its neighbors, each panel reflects sunlight differently, and the seam lines become visible as sharp tonal bands even though the physical join may be flawless.
This is one of the most punishing orientation errors in the trade because it is almost always a planning failure, not a materials failure. On a $10,000 landscape installation, a mixed-grain checkerboard reads as sloppy workmanship from the client’s first look — it raises immediate doubts about whether the contractor cut corners elsewhere, and because the defect lives in the roll orientation itself, it usually cannot be corrected without lifting and re-laying the offending panel.
How to Read Pile Lean Across the Lawn
Grain direction is verifiable in under a minute per roll, before any cutting or fixing happens. Two field checks are reliable:
- The hand-stroke test: Drag a flat palm across the surface. Stroking with the grain feels smooth and low-resistance because the blades lie down under your hand. Stroking against the grain produces noticeable drag as the blades spring upright.
- The sheen test: Kneel at each end of the roll and sight across the surface. From one direction the turf reads darker and flatter; from the opposite end it reads lighter and glossier. That shift in sheen marks the lean of the pile.
Check With the Grain Against the Grain Hand stroke Smooth, blades lie flat Drag, blades stand up Sheen at a distance Darker, flatter tone Lighter, glossier tone Blade lean vs. viewer Leaning away Leaning toward The professional habit that prevents this mistake entirely is marking orientation at the point of delivery. As each roll is unrolled, a chalk arrow is drawn on the backing indicating pile direction, and every subsequent panel is aligned to that arrow. On multi-roll jobs — where panels may be handled by different crew members across several days — this single step eliminates most grain mismatches before they occur.
Why Mixed Grain Photographs as a Checkerboard
The polymer physics behind the checkerboard deserves one sentence, not a second lecture. Synthetic blades are extruded polymer sheets with reflective pigments baked in, so their brightness shifts with the angle between blade, sun, and viewer.
The defect is worst under low-angle light — early morning and late afternoon — which is exactly when most homeowners and real-estate photographers shoot a property. Drone shots and elevated listing photos amplify it further, because the camera captures the whole field’s alternating reflection pattern at once. Under harsh midday overhead sun the contrast flattens out, which is why the problem sometimes escapes a midday final inspection and surfaces later in client photographs.
One nuance worth knowing: on putting greens, grain is a performance issue as well as a visual one. Balls roll faster down-grain than against it, which is why green installations are laid in a single consistent direction as a rule — mixed grain would produce inconsistent ball speed across the surface, not just a shade difference.
Correcting a Mis-Oriented Roll
Correction options narrow fast as the installation progresses, so the escalation path matters:
- Before fixing: Re-roll and rotate the panel. This is free and takes minutes. If a grain mismatch is caught before any panel is pinned or adhered, the fix is simply repositioning.
- Targeted brushing: A stiff-bristle broom or power brush worked against the lean along the transition line, with cross-direction passes, can partially blend a mild shade delta. Shorter-pile landscape products respond reasonably well; taller-pile products rarely blend completely because the lean is too pronounced to lift out.
- Panel replacement: Once seam adhesive has cured, the reliable fix is cutting out the mis-oriented panel and re-laying it with matched grain. Flipping a cured panel in place is not an option — it creases the backing and tears the coating layer.
💡 Expert Pro-Tip:Before the final panel is secured, walk to the property’s main vantage point — typically the patio or back door — and sight across the full field at the time of day the client actually uses the space. Low sun exposes grain mismatch that midday light hides. If the panels disagree, this is the last cheap moment to fix it.⚠️ Critical Pitfall:Grain orientation is decided at delivery, not discovered at the end. A crew that unrolls panels in whatever order the pallet presents them will eventually produce a checkerboard — and once adhesives cure, that defect costs a panel, a re-seam, and a client’s confidence in every other detail of the job.See Our Full Range of Landscaping Artificial Grass Options.Explore CNC-tufted branded turf mats, custom logo formats, and a complete selection of landscaping-grade artificial grass for residential and commercial projects.
Mistake 5: Edges Lifting Because of Weak Anchors
Edges lift when fastener spacing, gauge, or penetration depth cannot resist traffic pull and daily thermal movement. Treat perimeter fixation as a written specification — not a finishing touch applied at the end of the job.
Edges lift because the anchoring system loses a fight against three forces: directional pull from foot traffic, leverage acting on the unsupported cut edge, and the constant expansion and contraction of polyethylene and polypropylene. Once the first fastener releases, load transfers to its neighbors and the failure runs along the perimeter — a failure mode installers call “turf creep.” The exposed lip then collects debris, abrades the backing from underneath, and forms a genuine trip hazard on walkways, playgrounds, and commercial entrances.
Why Weak Anchors Fail: The Mechanics
Thermal movement is the force most crews underestimate. Turf left in full sun cycles through swings of 30°C or more, and an unrestrained edge can move several millimeters per linear meter across that range. When fasteners sit too far apart, that movement concentrates in the backing between anchor points until the material pulls up and over the nail heads. Traffic finishes the job — every footstep on a raised edge works like a lever against the fixation point.
The failure is predictable, and so is the fix: closer spacing, heavier fasteners, deeper penetration, and a fixation method matched to the substrate.
Correct Pin Spacing and Depth: The Working Standard
- Fastener specification: 150mm (6-inch) hot-dip galvanized nails or spikes. Thinner electro-galvanized pins corrode quickly in damp bases and lose holding power within one or two seasons.
- Perimeter fixation follows a written standard, and that standard is measured in nail spacing. Perimeter spacing: 150mm (6-inch) hot-dip galvanized nails driven every 200–300mm (8–12 inches) along every traffic-bearing edge — gate lines, path borders, playground perimeters — each placed 30–40mm inside the edge to prevent splitting and edge lift. No traffic-bearing edge should exceed 300mm spacing.
- Field pattern: 300–500mm (12–20 inches) in a staggered grid beyond the perimeter zone to control mid-field movement.
- Penetration depth: at least two-thirds of the fastener length seated into compacted base material, with the head sitting flush on the backing.
- Driving technique: set fasteners at a slight outward angle so tension pulls the edge down into the base rather than up and over the head.
⚠️ Critical Pitfall:Over-driven fasteners dimple the primary backing and telegraph through the face of the turf. Flush means flush — a buried head creates a permanent depression that no amount of infill brushing will hide.Adhesive vs Fasteners: Match the Fixation to the Substrate
On compacted aggregate bases, mechanical pins win on speed, cost, and adjustability. On hard substrates the logic inverts: pins spall concrete, split timber decking, and puncture waterproofing membranes — a nail driven through a roof membrane turns a surfacing job into a structural leak claim. This is where adhesive fixation is the correct engineering choice, not a compromise.
Fixation Method Best Substrate Perimeter Specification Watch-Outs A fixation table that disagrees with the anchoring section undermines both. Galvanized pins/spikes Compacted aggregate, crushed rock 150mm galvanized nails every 200–300mm on the perimeter, set 30–40mm inside the edge Corrosion if non-galvanized; over-driving puckers the backing Polyurethane adhesive Concrete, timber decks, roof membranes, balconies 6mm bead every 100–150mm, or a continuous 10–15mm ribbon at exposed edges Requires a dry, dust-free surface; roughly 24-hour cure before traffic Hybrid (pins + adhesive bead) High-traffic edges, roof terraces with wind uplift, putting surfaces Pins at 100mm centers plus a continuous bead Highest labor cost; reserved for edges where movement is unacceptable The hybrid approach earns its cost wherever millimeter-scale movement matters: on putting surfaces where a lifted edge alters ball roll, on rooftops where wind uplift works the perimeter continuously, and on commercial entrances where traffic volume is measured in hundreds of crossings per day.
Re-Securing a Failed Perimeter: The Corrected Pattern
📋 Actionable Steps
- Step 1: Lift and diagnose. Pull the edge back roughly 300mm and identify the cause — corroded fasteners, spacing wider than 150mm, or heads sitting proud of the backing.
- Step 2: Re-dress the turf. Work the material flat toward the edge with no tension folds, and trim any frayed or stretched backing back to sound material before refixing.
- “A redo perimeter gets exactly one chance, so the replacement pattern must be the specification, not a repeat of the failure. Step 3: Install the corrected pattern. Set new 150mm galvanized fasteners at 200–300mm centers, positioned 30–40mm inside the cut edge, each seated two-thirds of its length into the compacted base with the head driven flush.”
- Step 4: Bond on hard substrates. Clean and dry the surface, run a 6mm polyurethane bead every 100–150mm — continuous along exposed edges — weight the edge, and keep traffic off for the full cure window of roughly 24 hours.
- Step 5: Tug-test the entire run. If any single point lifts under a firm hand pull, the pattern is still too sparse. Add fasteners until the whole run holds.
⚠️ Critical Pitfall:A lifted edge is never cosmetic. Pebbles, leaves, and debris work underneath the carpet and abrade or perforate the backing, while the exposed lip is a documented trip-and-fall liability on any commercial site. For contractors, a callback crew costs several times what setting the anchor pattern correctly on day one would have.The professional safeguard is contractual: write the anchor pattern into the scope of work — fastener type, spacing, penetration depth, and substrate method — so the fixation standard is enforceable before the first pin goes in, and the perimeter holds for the life of the installation.
Mistake 6: Getting the Weed Barrier Wrong
The correct weed barrier under artificial grass is a rot-proof, permeable nonwoven geotextile — never plastic sheeting. It belongs on the prepared subgrade, beneath the aggregate base, with joints overlapped at least 100 mm (4 in) on level ground and up to 300 mm (12 in) on slopes or soft soils. Installers who substitute hardware-store poly film, skip the membrane entirely, or overlap it too narrowly create a hidden failure layer that saturates the base and lets weeds breach the surface within one or two growing seasons.
A weed membrane has one job: block light, pass water. Any barrier that fails the second half of that sentence will eventually fail the installation.
Criterion Plastic Sheeting (Poly Film) Nonwoven Geotextile Water handling Zero permeability; water sits on top Free-draining; water passes in seconds Effect on base Creates a saturated, unstable layer Separates base from soil, keeps it stable Durability under load Tears and becomes brittle under aggregate Rot-proof, mold-resistant, survives compaction Long-term weed result Weeds root in trapped silt and surface debris Light blocked while drainage stays intact Why Plastic Sheeting Fails Under Turf
Impermeable poly film looks like a shortcut: it is opaque, cheap, and blocks weeds on day one. The problem arrives with the first heavy rain or irrigation cycle. Water drains through the turf’s perforated backing and the aggregate base, hits the plastic, and has nowhere to go. The result is a perched water table sitting directly under the lawn.
That trapped moisture softens the subgrade, washes fines out of the base, and creates a slick plane that allows the whole system to creep laterally. In pet installations the consequence is worse: urine and rinse water collect at the film layer instead of percolating away, producing persistent odor that no amount of infill treatment can resolve. In cold climates, the same trapped water drives freeze-thaw heaving through winter.
⚠️ Critical Pitfall:Never install plastic sheeting between the base and the turf as a “moisture barrier.” It inverts the drainage design of the entire system and converts a minor surface water issue into a chronic saturation problem under the lawn.What the Correct Membrane Specification Looks Like
Not every “weed fabric” on the shelf performs the same. Thin woven landscape fabrics can clog with silt and tear during base spreading. For artificial grass, contractors should specify a needle-punched nonwoven geotextile with the following characteristics:
- Material: Polypropylene or polyester, needle-punched nonwoven construction, UV-stabilized for exposure during installation.
- Weight: 80–120 g/m² for standard weed suppression; upgrade to 150–200 g/m² where the membrane must also act as a separation fabric over soft or clay-rich subgrades.
- Permeability: Water should pass through immediately, not through pre-cut holes that silt can seal shut.
- Rot and chemical resistance: The membrane must remain inert for the life of the turf system, unaffected by moisture, fertilizers, or pet waste.
Overlap Widths and Positioning
The membrane goes down after the subgrade is excavated and shaped, directly on the soil, with the aggregate base built on top of it. This position does double duty: it suppresses upward weed growth and stops the base stone from punching into soft soil. In regions with aggressive weed pressure, some contractors add a second layer on top of the finished base, immediately beneath the turf.
- Overlap on level, firm ground: Minimum 100 mm (4 in).
- Overlap on slopes, sandy, or soft soils: 150–300 mm (6–12 in), shingled downstream so water flows over the joint, not into it.
- Pinning: Galvanized U-pins or ground staples every 300–500 mm (12–20 in) along overlaps and perimeters, keeping the fabric taut and flat before any stone is spread.
- Perimeter treatment: Turn the membrane up 50–100 mm against edging boards, kerbs, or paths so weeds cannot creep in laterally at the margins.
- Seam logic: Stagger membrane joints away from planned turf join locations, and cut only small cross-slits where posts or drainage features penetrate.
💡 Expert Pro-Tip:Re-check every overlap after the aggregate is spread and compacted. Compaction equipment can drag or fold a loosely pinned membrane, collapsing a 100 mm overlap down to a few millimeters before anyone notices.How to Fix a Skipped or Wrongly Installed Membrane
Remediation depends on what is actually under the lawn, so diagnosis comes first. Lift a corner of the turf or cut a small test flap near a join and inspect the layers. Then follow the relevant path:
📋 Actionable Steps
- Step 1 — No membrane, base still sound: Peel back the turf rolls carefully and set them aside in shade. Sweep the base surface clean, lay the geotextile directly over the compacted base, overlap and pin to spec, then re-lay the turf.
- Step 2 — Plastic sheeting installed: Lift the turf and roll back or excavate the base layer that sat on the film, which is typically saturated or contaminated with washed-in fines. Remove 100% of the plastic, re-level and re-compact the subgrade, then rebuild the base before installing the membrane in its correct position.
- Step 3 — Membrane present but under-lapped: Where overlaps have separated, expose the joint, pull the sheets back to a full 100–300 mm overlap, pin at 300–500 mm spacing, and replace the covering base material.
- Step 4 — Verify before closing up: Pour a bucket of water on the rebuilt section and confirm it percolates through within minutes rather than ponding. Re-lay the turf, re-anchor the perimeter, and re-check any disturbed joins.
A membrane retrofit costs a fraction of the alternative. Once weeds root into a saturated, plastic-lined base, the only fix is a near-full teardown — the same teardown that a correctly specified geotextile makes unnecessary for the life of the installation.
Mistake 7: Wrinkles, Ripples, and Edges That Lift
Wrinkles, ripples, and edges that curl weeks or months after the install crew leaves are tension failures, not fastening failures. The sheet was either pinned down while still carrying coil memory from the roll, stretched drum-tight during installation, or fixed under a thermal load it was never given time to release. Even a perimeter anchored to specification will deform if the material itself was installed under the wrong tension state — which is why this mistake keeps appearing on jobs where “the anchoring was fine.”
Ripples mean slack — slice it out. Lifted edges on a taut sheet mean contraction — release, re-stretch, re-tack. Both trace back to skipped acclimation, over-tensioning, or thermal movement.
Putting surfaces raise the stakes on deformation to a different order entirely. A single ripple that breaks the flat roll renders the green unplayable, because golfers read a ripple’s contour as break long before they read the actual grain or slope.
Why Turf Deforms Months After a “Finished” Installation
Synthetic turf sheet is a polymer product, and it behaves like one. Three mechanisms account for nearly all post-install deformation:
- Skipped acclimation: Rolls come off the pallet coiled tight. If the sheet is unrolled and pinned immediately, the coil memory keeps pulling after the fixings are set — producing ripples that “appear” weeks later when the memory finally wins.
- Over-tensioning: Installers stretch the sheet to erase every visible crease. But turf needs a small amount of built-in slack to tolerate movement; a sheet installed taut has nowhere to go except upward or outward when conditions change.
- Thermal contraction: Polyethylene and polypropylene expand in heat and contract in cold. Field measurements consistently show dark turf surfaces running 20–30°C above ambient air temperature in direct summer sun, meaning a sheet stretched flat on a 30°C afternoon is working against a dramatically different material state by a 10°C night.
The result is predictable: slack ripples where the sheet was over-stretched and has since relaxed, or tenting and edge pull-away where the sheet contracted against fixed points. Homeowners typically notice the deformation months after handover, which is exactly why it reads as a product defect rather than an installation artifact — and why diagnosing the tension state correctly matters before any cutting starts.
Read the Deformation Before You Cut
The two failure modes demand opposite repairs, and misdiagnosis makes things worse. A slack ripple has visible excess material — press it flat and the surplus has to go somewhere. The fix is removal, not suppression. A contraction lift is the opposite: the sheet feels tight, the edges pull away from the perimeter, and forcing it flat by hand requires real effort. Cutting slack out of a contracted sheet converts a lift into tension; the repaired zone will tent on the next cold night.
Time the repair for a moderate window — mid-morning in mild weather. Never fight a sheet at peak heat, when it is at maximum expansion, or on a cold morning, when it is at maximum contraction. Either extreme gives you a false reading of the sheet’s resting state.
The Repair Sequence
📋 Actionable Steps
- Step 1 — Slice and re-butt the ripple: Cut directly along the crest of the ripple for its full length. Pull the two fresh cut edges flat so they overlap, double-cut through both layers in a single pass to remove the slack strip, then rejoin the edges so the pile direction stays continuous.
- Step 2 — Release and re-stretch: For a contracted, taut sheet, release the fixings around the deformed zone, work the sheet flat from the center outward, and let it settle into a neutral tension before anything is re-secured.
- Step 3 — Re-tack lifted areas: Only after the sheet sits flat, re-fasten the lifted edges or corners. Pinning a lifted corner while residual tension remains in the sheet guarantees the same lift returns — you are treating the symptom, not the load.
- Step 4 — Power brush against the grain: Run a power brush opposite to the blade direction across every repaired zone. Brushing against the grain re-stands the matted and flattened fibers so the patch reads uniform with the surrounding surface instead of showing as a visible flat band.
- Step 5 — Recheck after the first temperature swing: Inspect the repaired area after the first hot-cold cycle following the fix. A zone that stays flat through a full swing is stable; one that starts to move still carries tension that needs releasing.
⚠️ Critical Pitfall: Never slice out a ripple and simply pin the gap shut. That converts slack into tension in a single move, and the sheet will tent or pull its fixings on the first cold night. The double-cut technique exists precisely so the removed slack leaves two fresh edges that sit flat under no load.💡 Expert Pro-Tip: The same acclimation rule that prevents deformation also governs the repair. Let any re-laid section relax flat for at least two to four hours in mild weather — overnight when working below roughly 15°C — before final fixing and cutting. Contractors who skip this step on the repair end up repeating the repair.Handled correctly, a deformation repair is invisible within one maintenance cycle: the double-cut seam disappears into the pile, the re-tensioned sheet tolerates seasonal movement, and power brushing restores the fiber stance so the lawn reads as one continuous surface rather than a patchwork of fixes.
Conclusion
Most turf failures we see trace back to two things: a poorly compacted base and rolls laid in mismatched pile directions. Both are cheap to fix before installation, expensive after. Infill is the quiet third killer — too little and blades mat within a season, too much and drainage chokes. Dial in those three, and warranty callbacks mostly vanish from your books.
That last point matters for your margins. Every callback eats labor hours and dealer goodwill. If you’re quoting a project, send us the square footage, site conditions, and drainage plan — our engineering team will review the spec, flag slope and seam-placement risks, and recommend the right turf construction for the application. No obligation. Just fewer surprises when the crew rolls out.
Install Fewer Problem Rolls on Your Next Container
Most installation failures we see trace back to narrow rolls and weak backing, not installer skill. We are a factory-direct supplier with 18 years of export experience, producing PP+Net and PU backed artificial grass rolls in 2, 4 and 5 metre widths at 25 metre lengths — wider rolls mean fewer seams to fail. Our team will match width, backing and pile to your site plan before you commit a container. Request an exact quote for your project volume, or start with a free 20x20cm sample.
Frequently Asked Questions
Can I lay artificial turf over existing grass?
No—existing grass, weeds, roots, and organic debris must be excavated before any turf goes down, typically 3-4 inches of material. Organic matter trapped beneath turf decomposes over time, creating soft spots, unpleasant odors, mold, and drainage failure, while surviving weeds push straight through seams. Proper excavation followed by a compacted sub-base is what separates an installation that lasts decades from one that fails within a season.
How long should turf acclimatize before installation?
Unroll the turf and let it rest flat in the sun for at least 1-2 hours before cutting or seaming. Warm fibers straighten and the backing relaxes, releasing the roll memory that would otherwise reappear as wrinkles or lifted edges weeks later. In cold weather, allow several extra hours, since stiff backing is harder to flatten and cut cleanly. This simple waiting step prevents one of the most common post-installation complaints.
How do I choose the right infill type?
Match the infill to the application: silica sand suits most landscaping, rounded sand performs best on putting greens, and pet areas need a free-draining, odor-controlling infill. Playgrounds call for a cushioned infill to help meet fall-height safety ratings. The wrong infill can compact, trap odors, or impede drainage even when the turf itself is excellent—both quantity and type matter.
Can reflective windows melt artificial grass?
Yes. Energy-efficient low-E windows can reflect and concentrate sunlight enough to reach turf-melting temperatures, producing shiny, distorted patches. Most warranties exclude this type of damage, so it pays to assess window placement before installing. Anti-reflective screens, awnings, or shade structures near affected glass are far cheaper fixes than replacing a melted section.
What maintenance prevents problems after installation?
Brush the fibers upright monthly—against the grain in high-traffic zones—remove leaves and organic debris before they decompose, and rinse pet areas regularly. Top up infill annually where use is heaviest, since displaced infill is the leading cause of matting and drainage issues in otherwise sound installations. An hour of seasonal care prevents most of the failures described in this article.
Can improper installation void my artificial grass warranty?
Often, yes. Most manufacturers void coverage when turf is installed against their guidelines—wrong infill, an inadequate drainage base, or improper anchoring are the usual culprits. Policies also commonly exclude reflective window damage, floods, and chemical spills, and claims typically require the original receipt plus proof of proper installation. Photograph the base preparation and keep infill specifications on file before covering everything up.
Is DIY artificial grass installation worth the savings?
For small, simple, rectangular areas, DIY can work well if you follow base preparation and seaming fundamentals carefully. Larger spaces, curved borders, and complex drainage demand professional experience, because errors in those areas are expensive to reverse—a failed base usually means tearing everything out and starting over. Weigh not just the installer quote but the potential cost of redoing a botched job before deciding.