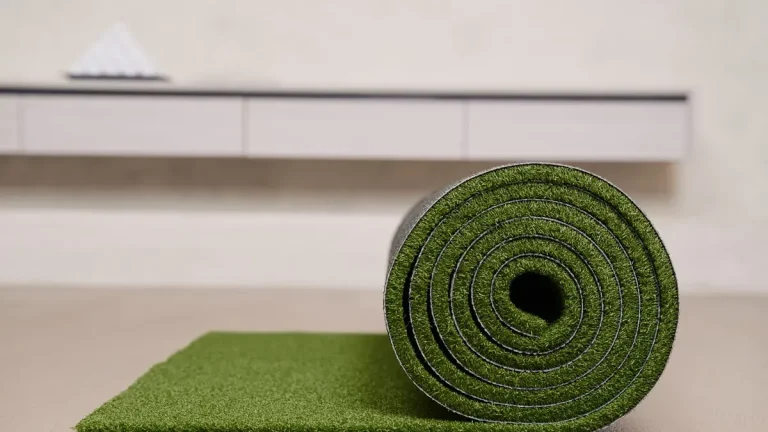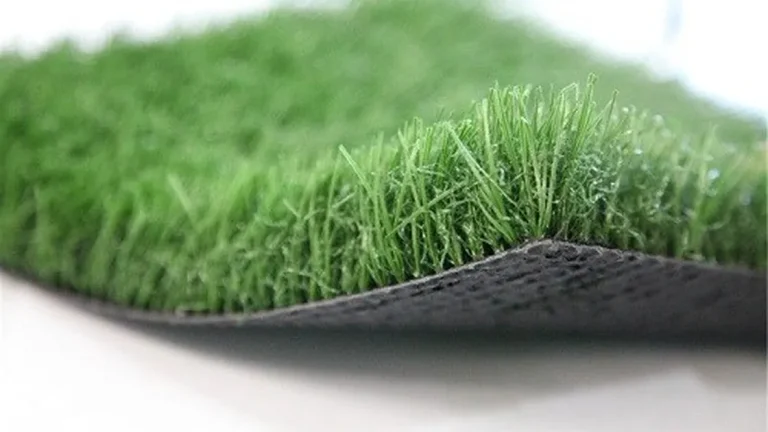







Two rolls of turf can look identical in a supplier’s photo gallery and still age nothing alike. One keeps its color and pile through years of service. The other fades to white at the tips, sheds fibers along the seams, and delaminates at the backing within a couple of summers. The difference is decided inside the artificial grass production process, not in the brochure.
Artificial grass is made in eight steps: compounding, extruding, twisting, tufting, coating, drying, perforating and rolling up. The product class has come a long way since artificial turf drew wide attention in 1966, when it was installed at the Astrodome. How artificial grass is made still decides whether a roll serves its full life or fails early, and that happens at the stations rather than in a catalog. On our line we walk visiting buyers past each station in machine order, because a buyer who has seen the artificial grass manufacturing steps reads data sheets differently.
Step 1: Compounding the Raw Material Mix
Step 1 answers the question every buyer asks first: what is artificial grass made of. Everything begins as polymer pellets, blended with pigments and a product-specific additive masterbatch before anything reaches an extruder. We run virgin polymer at this station, because recycled feedstock varies from batch to batch and consistent performance starts with consistent resin. The additive package is specified per product, so a turf destined for harsh sun carries a different masterbatch than one built for shade.
Polymer choice follows the application. Polyethylene is soft, flexible and the most natural looking, which is why it carries the face yarn in most landscape products. Polypropylene is stiffer and cost-effective, and nylon is the strongest and most resilient of the three, reserved for the highest traffic. Our common build pairs a polyethylene monofilament face yarn with polypropylene thatch, a combination that balances softness against the upright body of the blade. The guide to artificial turf materials: fibers, infill, backing covers that decision in more depth.
The additive masterbatch is where fade resistance is won or lost. UV stabilizer is mixed into the resin at this station, not sprayed on or applied later. When a cheap product skips proper UV treatment, the failure appears in the field as brittle blades, white tips and splitting fibers after the first real season of sun. A roll that faded in one summer was usually not harmed outdoors; it was born short at compounding. For a deeper treatment of this failure mode, see our explainer on why artificial grass fades and how UV stabilization works.
Step 2: Extruding the Turf Yarn Filaments
Step 2 is the loudest station on the line. Pellets from Step 1 are heated until molten, then forced through shaped openings to form thin filaments. This is the turf yarn extrusion stage, and it sets the character of every blade that follows. Die condition and draw consistency leave their signature in the filament long before tufting ever sees it.

The hot filaments are cooled immediately with air or water so the shape solidifies before anything touches them. From there the yarn is stretched, textured or curled into the blade and thatch profiles the design calls for. A spade-shaped blade on a sample sheet was not an accident; it was drawn and stretched into that geometry here.
The cooling medium matters more than it looks. Air cooling lets the filament surface stay slightly warmer for longer, which suits slower profile drawing. A water bath locks the shape fast and keeps the line speed up. Either way the point is the same: the filament has to solidify before the stretching rolls grip it, or the die’s geometry relaxes. A filament that drifts off its target diameter shows up later as an uneven pile, so the line watches it continuously.
Yarn weight is measured in Dtex, the weight in grams of 10,000 meters of yarn. Per a procurement guide’s published range, turf yarn runs roughly 8,000 to 15,000 Dtex, and higher Dtex gives heavier, more wear-resistant yarn. This station also separates manufacturers from assemblers. A mill that extrudes its own yarn controls the whole artificial grass production process downstream, while an assembler buys whatever the market happens to have. We explain that choice in why synthetic turf manufacturers extrude their own yarn.
Step 3: Twisting and Texturizing the Yarn
Step 3 is the anti-shedding step, and almost nobody talks about it. Several filaments are twisted together into a single strand, and twisting raises the strand’s strength and durability. When buyers report fibers shedding after a few months, the trail usually leads here or to the coating bath in Step 5. A strand that was never twisted tight enough lets go under wear. A higher twist level packs the filaments into a bundle that resists splitting under abrasion, while a loose one leaves fibers exposed to break off.
How tight the twist runs matters as much as whether it happens. The direction of twist is set per product and held consistent along the run, because mixed directions make the strand behave unevenly under wear. Texturizing follows twisting, and the curling and texturing pass fixes the geometry chosen in Step 2, setting whether the yarn stands up as a blade or lies as thatch. Texturizing gives thatch yarn its crimped, heat-set look, and skipping the pass leaves a strand too straight to mat down naturally. A skipped or rushed texturizer shows up as thatch that lies flat and shiny instead of cushioning the blades above it.
Quality control at the yarn stage covers tensile strength, elongation and denier, checks that directly affect how the finished turf looks and wears. The industry’s common Dtex grades, 6,300, 7,400, 8,800, 9,500, 10,000 and 11,000, give you a reference scale when a supplier quotes a yarn weight. Ask which grade your specification sits at. Then ask for the yarn-stage test values rather than a color card. A strand that fails here never recovers downstream, no matter how good the tufting and coating look.
Step 4: Tufting Yarn into the Primary Backing
Step 4 is where yarn becomes fabric. Tufting machines insert rows of yarn through a woven primary backing, much the way a carpet machine works, and this is the heart of the artificial turf manufacturing process. Creels of yarn packages feed the machine from behind, one path per yarn type. Tufting is also where the artificial grass production process turns your density specification into a physical machine setting.

Three settings govern the outcome. Gauge is the distance between yarn rows, typically 3/8 to 5/8 inch, and a smaller gauge packs the rows closer for a denser turf. Stitch rate is the number of stitches pushed through per meter of backing, typically 140 to 200, and a higher stitch rate improves fiber stability.
Pile height is locked in at this station as well, typically 25 to 65 mm overall. Sports surfaces sit toward the upper end and landscape products lower. Density is the product of gauge and stitch rate, and higher density usually performs better and costs more. The two settings trade off: a tighter gauge reaches the same density at a lower stitch rate. Blade shape is not decided here; it follows the yarn profile chosen back in Step 2.
Concrete numbers make the settings real. One published data sheet for a landscape product lists a stitch rate of 10.5 per 10 cm across the width and 16.0 per 10 cm along the length. That works out to about 16,800 tufts per square meter. This is what a density claim should arrive with: two numbers and a tuft count, not an adjective.
Step 5: Coating the Backing to Lock the Tufts
Step 5 locks everything down. A secondary coating of latex or polyurethane is applied to the underside of the backing to hold the tufts in place. Without this layer the tufted yarn is only thread pulled through fabric, and it pulls out under a stiff brush — coating weight is a real specification. One published data sheet lists a woven PP primary backing at about 260 g/m2, with a secondary SBR latex coating at about 1,300 g/m2. Along the whole synthetic turf production line, the coating bath is where tuft bind is created and where the artificial grass production process makes or loses its bond.
The choice between latex and PU is a genuine trade-off. PU is often selected for bond strength and dimensional stability, while latex is chosen where flexibility matters more. Construction varies as well, since backing can be single-layer or double-layer. Our own systems are PP+Net and PU, and the right answer for a project depends on traffic, drainage and how the roll will be installed. If you are weighing the options, our guide on how to choose the proper artificial grass backing walks through them.
Whatever the chemistry, the bond has to verify. Peel strength should come in at 40 N per 5 cm or better when tested per ISO 1763, the industry’s peel-test benchmark. Backing delamination is routinely traced to poor adhesive application at this station. The measured number matters more than the marketing copy around it.
Practical tip: before you approve a sample, ask for tuft-bind or peel test data instead of photographs. A photo shows the pile; a peel number tells you whether the tufts will still be in the backing after two seasons of use.
Step 6: Drying and Curing the Coated Backing
Step 6 looks uneventful and is not. The coated backing passes through a controlled heating and drying stage so the coating can set properly. On the conveyor the wet coating turns into the bonded layer the whole product depends on. The cure it receives here decides how that layer behaves for the rest of its life.

Heated drying bonds the yarn and backing further before the product reaches inspection. When the cure is incomplete, the failure appears months later as delamination and a backing that crumbles when flexed. The same goes for an adhesive film that went down too thin back in Step 5. This is the station to ask about when a supplier’s turf separates into layers in the field.
What the oven is doing is cross-linking the latex or PU film so it grips every tuft rather than merely surrounding it. An under-cured coat stays tacky and lets go at the tuft neck, which is the mechanism behind shedding that buyers blame on the yarn. An over-cured coat turns brittle and cracks when the roll is flexed during installation. Coating weight is set before the bath and confirmed after curing. The published sheet that lists roughly 1,300 g/m2 of SBR latex expects that weight to survive the oven unchanged.
Dimensional stability has its own guardrails. Per the same procurement guide, the backing should use at least a 3-ply PP scrim with proper curing. Shrinkage is tested to a maximum of 1% at 100 C for 6 hours. A backing that moves in heat will pucker a seam or open a joint even when the tuft bind is perfect. Curing and stability therefore get verified together before the roll moves on.
Step 7: Perforating and Shearing the Finished Pile
Step 7 gives the roll its finished face. Shearing trims the pile to an even height across the full width and removes defects that tufting or texturizing left behind. Brushing then lifts the fibers so the blades stand the way the design intends rather than lying flat from the process. Shearing runs to a tolerance of its own, and a blade set one millimeter high in one zone leaves a wavy surface that brushing cannot repair. Two rolls can carry the same specification and still look different straight out of the shear, which is why finishing gets its own station.
Drainage is prepared here as well. Depending on the product, the backing is perforated at intervals or manufactured with a fully permeable structure. One published data sheet lists 6 mm perforation holes and water permeability of about 60 ltr/m2/min unfilled. Those figures describe how fast water leaves the surface before any infill goes in, and they belong on the data sheet you compare. Holes spaced on a regular grid deliver that published rate through 6 mm openings, while a patchy pattern leaves dead zones where water sits.
Factories test water permeability, expressed in mm/hr, to confirm the turf meets its drainage specification before sign-off. When buyers report water pooling on a finished installation, the trail leads back here. The holes are too few, too small, or the permeable structure was value-engineered away. Pooling never shows up in a photograph, so the drainage numbers have to come with the sample. The grid of holes and the shear line above them are checked together, because a dense pile can hide a thin perforation pattern until the first storm.
Tired of Turf That Fades, Flattens or Sheds?
One line from compounding to coating turns your pile height and density spec into the roll. A free 20 x 20 cm swatch ships in four to six days.
Step 8: Inspecting, Rolling and Labeling the Turf
Step 8 is the last gate of the artificial grass production process and the first gate for you. Finished turf is inspected, trimmed to width and rolled for distribution. The inspection is where every number claimed upstream gets measured on the finished product. How can you tell good quality artificial grass from a sample? Partly by asking which of these checks the mill actually runs.
The check families worth knowing by name are these:
- Yarn stage: tensile strength, elongation and denier, carried over from the checks described in Step 3.
- Bonding: peel and tuft bind verified against the 40 N per 5 cm benchmark per ISO 1763; one published sheet lists tuft bind at about 30 N.
- Sheet geometry: width within plus or minus 1% of nominal per ASTM D5993, and pile height within plus or minus 3 mm per ISO 1766.
- Color and UV: delta E of no more than 3.0 per ISO 105-B02, referenced against 6,000 hours of QUV accelerated exposure; one published sheet lists xenon colour fastness above blue scale 7.
- Premium sports benchmarks: industry procurement guides name schemes such as FIFA Quality Pro and EN 15330-1 for the top tier of sports surfaces.
Every roll then gets a label with the product code, pile height, yarn type and batch number, which is what lets an importer trace quality back through customs. Standard roll widths run 2, 4 and 5 m by 25 m, with tailor-made widths on request. A label without a batch number is a roll without a history. It is the least expensive red flag in this business.
None of this requires a laboratory visit; it requires asking. For the complete list turned into a supplier questionnaire, see 11 key factors that determine artificial turf quality.
What Each Step Means for Your Specification
Read a data sheet the way the line reads an order, and the failures buyers report stop being mysteries. Fade traces to compounding, where the UV stabilizer was or was not mixed into the resin. Shedding traces to twisting in Step 3 and to tuft bind from the coating bath. Delamination traces to coating and cure in Steps 5 and 6. Pooling traces to perforation in Step 7, and each fear maps to one station with one number that settles it.
| Production step | Parameter it controls | Typical range | Failure when skipped |
|---|---|---|---|
| Step 1: Compounding | UV stabilizer masterbatch and pigment dosing | Mixed into the resin before extrusion | Fading, white tips, brittle blades |
| Step 2: Extruding | Yarn linear weight and blade profile | 8,000-15,000 Dtex | Weak yarn, wrong blade shape |
| Step 3: Twisting | Strand strength | Twisted multi-filament strand | Shedding and broken fibers |
| Step 4: Tufting | Gauge, stitch rate, pile height | 3/8-5/8 inch; 140-200 stitches/m; 25-65 mm | Thin, unstable pile |
| Step 5: Coating | Coating chemistry and tuft bind | Latex or PU; peel 40 N/5cm | Tuft loss, delamination |
| Step 6: Drying | Complete cure of the coating | Controlled heat until fully set | Crumbling backing |
| Step 7: Perforating | Drainage | 6 mm holes; about 60 ltr/m2/min | Pooling water |
| Step 8: Rolling | Roll width and traceability | 2/4/5 m x 25 m; batch label | Untraceable quality |
Lifespan follows the same logic. Commercial artificial grass lasts up to 10-15 years when every station does its job, and it falls short of that when one of them is cheated. When you compare suppliers, put the backing question first. Our article on why PU back glue synthetic lawn turf is better than latex backing explains the trade-off in detail. Every parameter in the table is a question you are entitled to ask, and the artificial grass production process is the map that tells you which station answers it.
That map is also the shortest honest summary of how artificial grass is made: eight stations, one roll, and a number at each station. The artificial grass production process ends at the label, and your due diligence starts with the same eight checkpoints.
Frequently Asked Questions
What is artificial grass made of?
Mostly polyethylene, polypropylene or nylon yarn tufted into a backing, held by a latex or polyurethane coating. Polyethylene is the soft, natural-looking choice for face yarn, polypropylene adds stiffness, and nylon is strongest. Additives mixed at compounding provide UV and color stability.
Why does artificial grass fade in the sun?
Fade starts at compounding, where UV stabilizer must be mixed into the polymer before extrusion. Products made with inadequate UV stabilizers turn brittle at the tips, whiten and split after sun exposure. The failure is manufactured in, not caused by weather alone.
What does Dtex mean in artificial grass?
Dtex is the yarn’s weight in grams per 10,000 meters. Per a procurement guide, turf yarn typically runs 8,000 to 15,000 Dtex, and higher Dtex means heavier, more wear-resistant yarn. It is a direct read on yarn robustness.
Why do artificial grass fibers shed or break off?
Shedding comes from weak yarn strands or weak tuft bind. Filaments not twisted into a strong strand break under wear; tufts the coating grips poorly pull out. Density settings and peel strength tested to 40 N per 5 cm catch both.
How can I check quality from a sample?
Order the free 20 x 20 cm swatch, then ask for test data to match it: Dtex, tuft bind, permeability and UV exposure results. One published data sheet lists tuft bind at about 30 N. Numbers, not photographs, distinguish samples.